So last
weekend I ended up attending 2 weddings. Joyful and knackering and boozy
but happy to have been invited to both. After the first one though I
noticed when I got home that a seam was split in the leg of my pants and
my only dress shirt had some curious orange stains on the back.
So
OFF TO THE SHOPS it was come Sunday noon to grab a new suit and a
shirt. I also kept an eye out for cufflinks as I'd worn the same South
Park cufflinks I've had since South Park first came out. I had a
hankering for something geeky but the only ones I could find in
highstreet shops were expensive and bland.
I returned home and
reluctant to wear Wendy and Stan (vomitting) on my cuffs again I set
about crafting a pair from LEGO, my most versatile and favourite
toy/craft/friend.
And here's the results:
The main 4stud blocks are the front part
and the grey part slips through the cufflink holes. Then you attatch
the little blue bits at the back to stop it coming back through.
Here's a quick how to-
You will need:
These
x2. Dunno what they're respective parts numbers are called but to join
the 4stud block to that grey T-joint one you need that blue joint one.
It has a clicking-in-joint and a cross-joint at either end.
The clicking in part goes in the brick's central hole, thus:
Then the grey T-joint slots atop the blue cross-joint. Hence:
Now,
it should be noted that LEGO is designed to snap together but also come
apart easily too. When placed in a cufflink hole any sharp tugs of the
fabric, stretching of the cuff, or generally anything pulling or
knocking it can pull all of this apart.
This is why I bonded all three together with epoxy glue.
(I am usually
loathe to sacrifice any of my LEGO pieces by doing the unthinkable and
glueing them together permanently, but I felt justified in doin this
this one time because I have tons of these parts and I really needed
cufflinks. Especially super cool ones)
So after they had dried I slipped the back piece through the holes and attatched the little stud connectors. Behold:
They attach very firmly in place and can be removed but it takes a lot more force, so the cufflinks stayed put all night.
I'm
not sure what the difference is between blue and grey versions of this
piece (possibly the blue ones clip-in part doesn't move as easily) but
both types work just as well for this purpose. I just used the blue ones
because they're bright and I'm less likely to lose them if I take 'em
off.
I chose blue and red cos they're primary and went with my suit/tie combo but you can choose any colour.
You
might be tempted to use other cool looking bricks too but take care
that some don't have the space to fit the blue clipping-in joint inside
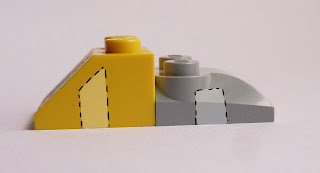
them. See examples below:
Of course if you use glue to secure them then that won't matter as much.
There are no
doubt many other variations you can come up with on your own. I was
thinking of using some minifigure heads but decided against it at the
time. However it might be a nice touch if you had some that looked like
you, or your partner or the bride and groom.
Just be prepared for them not having as much resistance as larger bricks. (and you'll DEFINITELY need glue to hold 'em on)
Well have fun building/crafting, hope they turn out as ace as mine did!
Until next time fools,
Pete


No comments:
Post a Comment